Installation Guide
Welcome aboard! 🎉 We're really happy to have you with us. Let's get your new RealHomes site up and running.
Before we jump in, double-check that your hosting setup handles WordPress requirements. RealHomes runs smoothly on pretty much any host, whether it's shared, dedicated, or something in between, as long as WordPress itself works fine.
✅ First Things First
You’ll need a fresh WordPress installation. Most hosting companies have a one-click installer in their control panel that makes this super easy. If you're setting it up yourself, the official WordPress Installation Guide is your best friend.
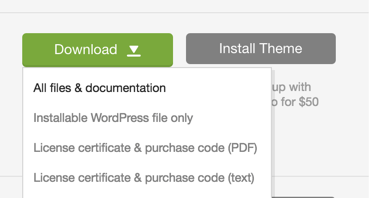
Once WordPress is ready, head to your ThemeForest account and download the “All Files and Documentation” package. Unzip that file on your computer. Inside, look for realhomes.zip. That's the actual theme file you'll be uploading.
Heads Up: Don't Upload the Wrong File!
A common mistake is trying to upload the big zip file you downloaded from ThemeForest. That won't work. Make sure you extract it first and only upload realhomes.zip.
📦 Install via WordPress Dashboard (The Easy Way)
This is the method we recommend because it's usually the quickest.
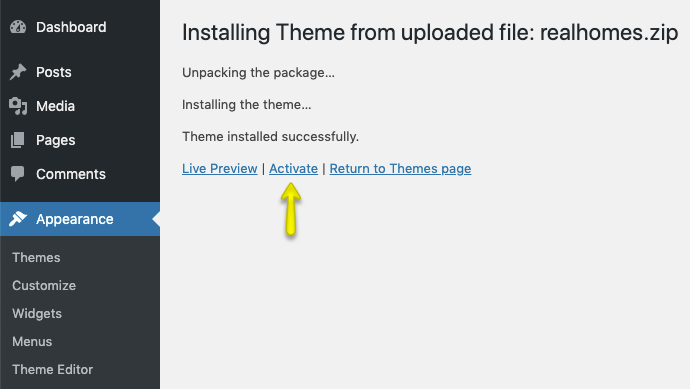
Step 1: Upload and Activate
-
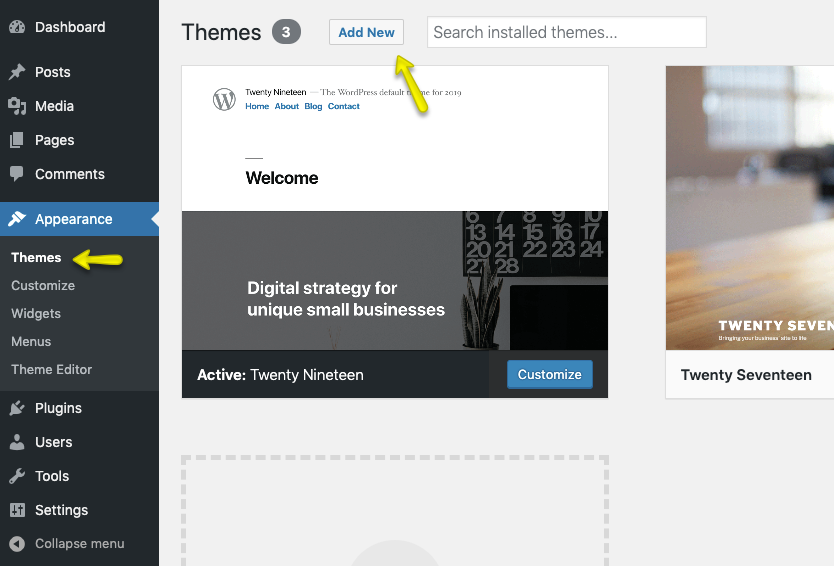
Go to your WordPress dashboard, navigate to Appearance → Themes, and click that Add New button at the top.
-
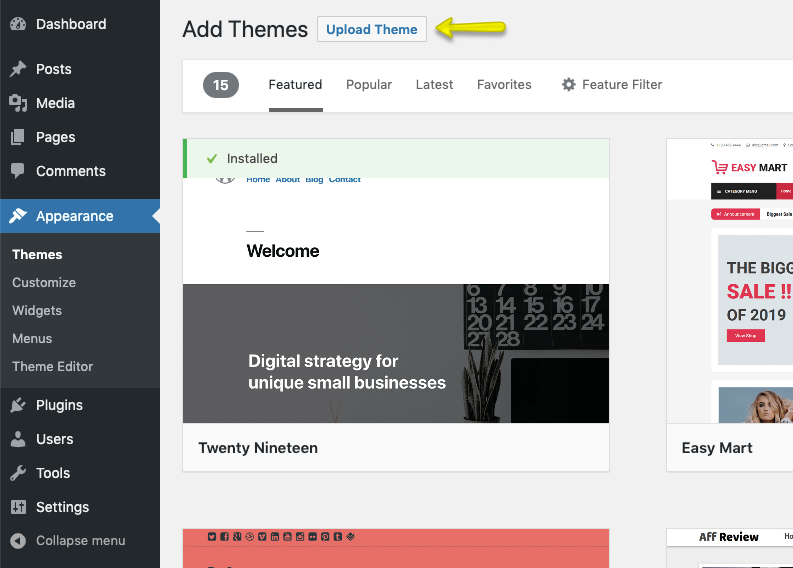
Click the Upload Theme button.
-
Select the
realhomes.zipfile we found earlier and hit Install Now.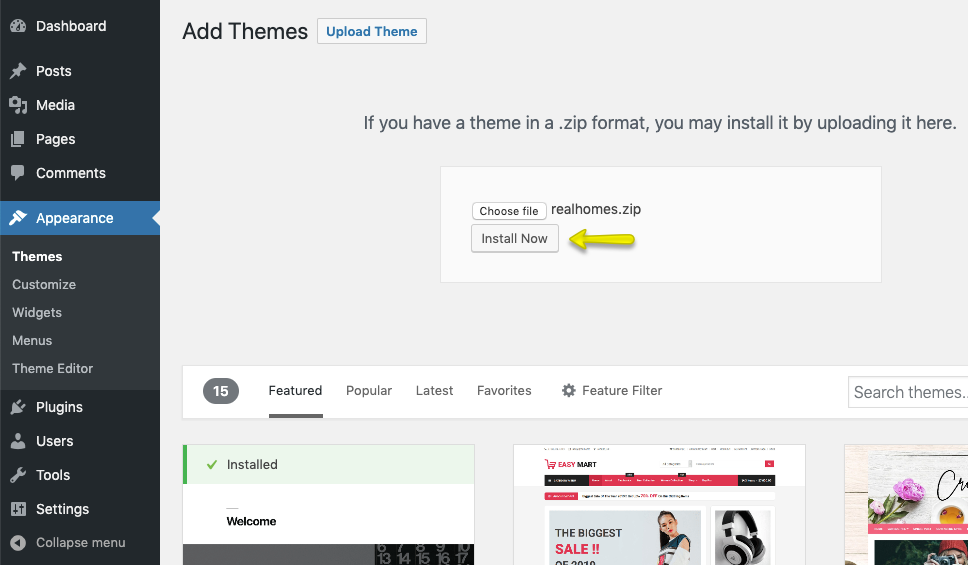
-
When it finishes, click Activate to switch on the theme.
Step 2: Choose Your Style
As soon as you activate, you'll see the RealHomes Welcome Page. This is where you pick the layout that fits your vision: Ultra, Modern, or Classic.
Just click the one you like and hit Save Changes.
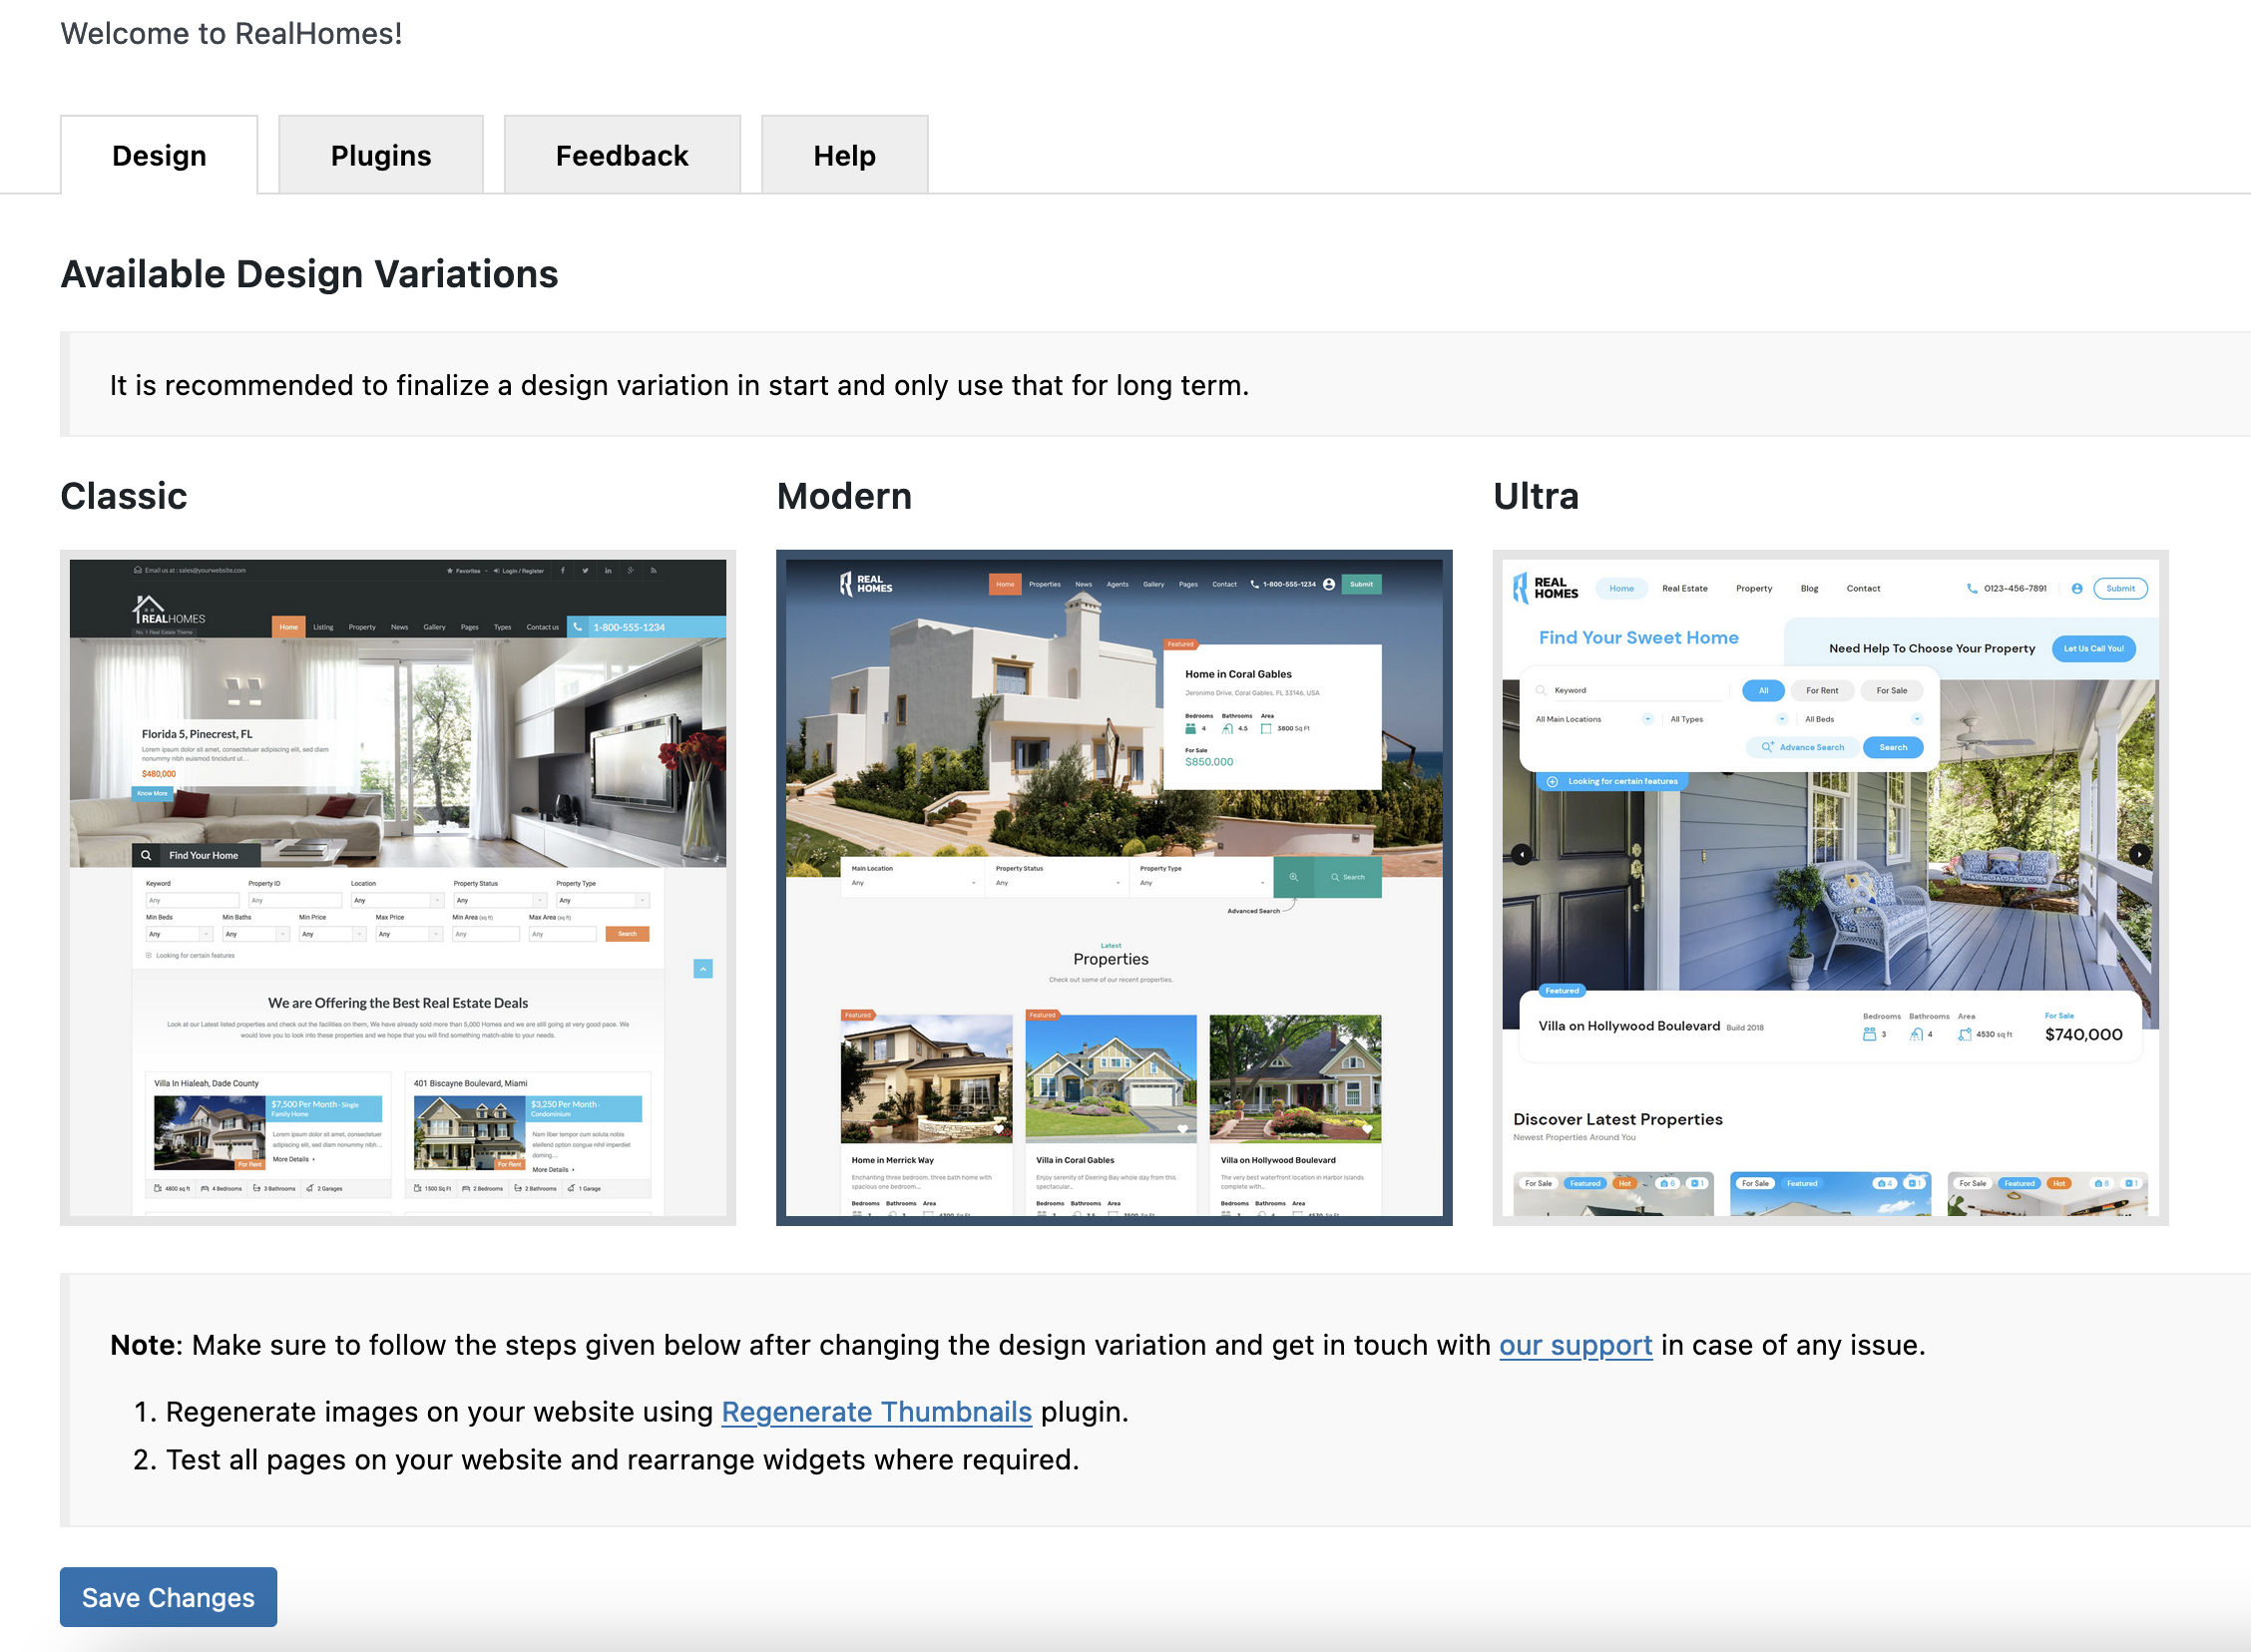
Stuck on which one to pick? Take a look at our Design Selection Guide for a quick comparison.
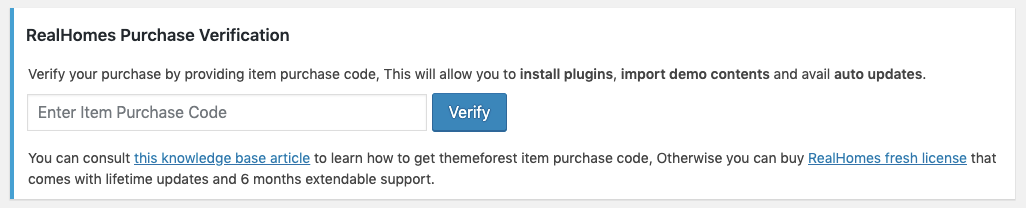
Step 3: Activate Your License
To get all the good stuff (like automatic updates and premium plugins), you'll need to verify your purchase.
- Find the license box on the welcome screen.
- Paste in your Item Purchase Code.
- Click Verify.
And that's it! All features are now unlocked.
Can't find your code? Here's how to grab it: 👉 How to Get Your ThemeForest Purchase Code
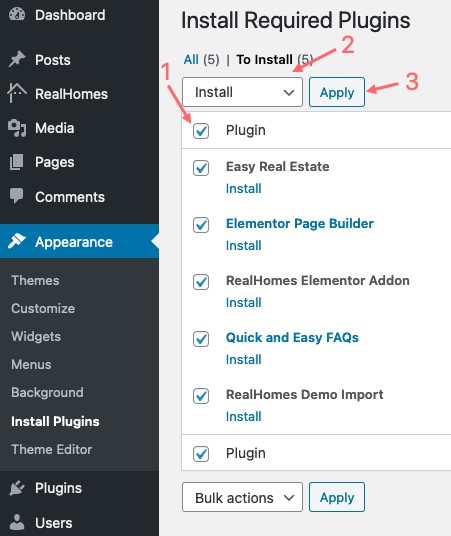
Step 4: Install the Plugins
Now the theme will let you know which plugins it needs to function.
-
Click on Begin installing plugins.

-
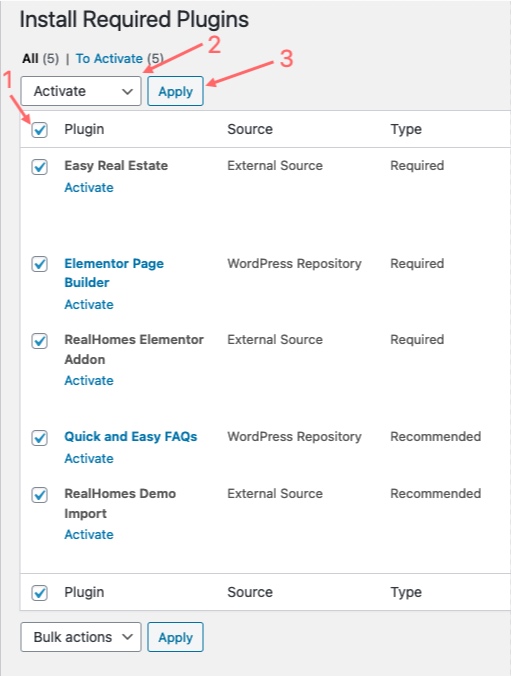
Tick the box to Select All plugins.
-
In the dropdown, choose Install and click Apply.
-
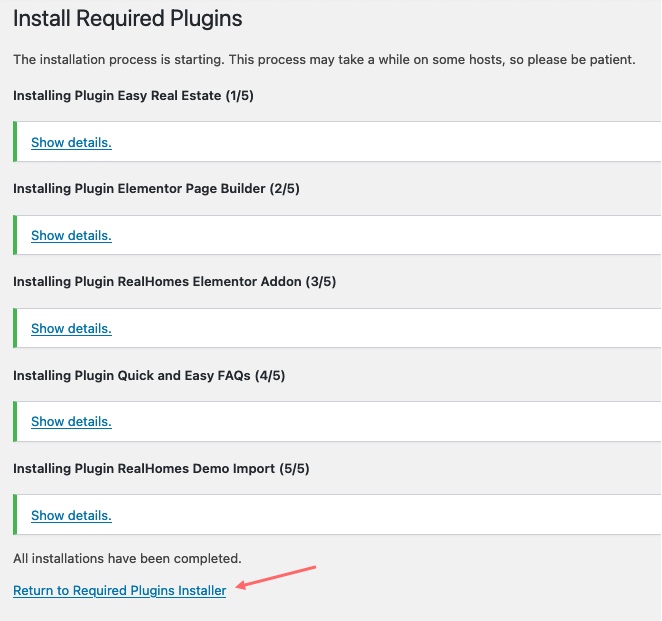
When they're done, give them a quick check, then click Return to Required Plugins Installer.
-
Select them all again.
-
This time, choose Activate in the dropdown and click Apply.
Step 5: Fix Your Links (Permalinks)
We need to make sure your URL structure looks good for Google and makes sense to humans.
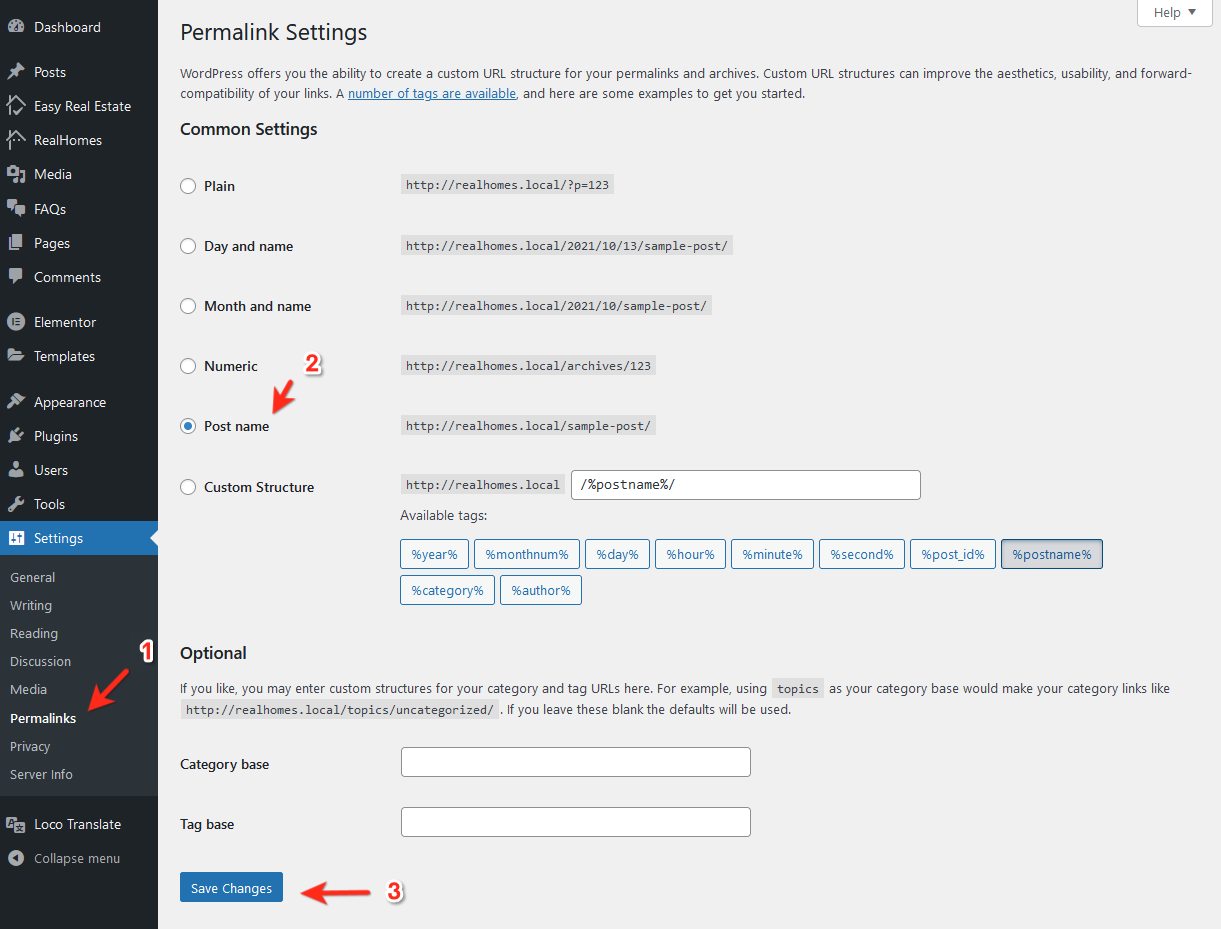
- Go to Settings → Permalinks.
- Choose Post name.
- Hit Save Changes.
Step 6: Tweak Elementor
If you're using Elementor, let's make sure it plays nicely with RealHomes styles.
- Go to Elementor → Settings.
- On the General tab, check these two boxes:
- ✅ Disable Default Colors
- ✅ Disable Default Fonts
- Click Save Changes.

🛠️ FTP Installation (The Backup Plan)
If the dashboard upload is giving you trouble (sometimes file size limits get in the way), FTP is a solid alternative.
- Open your favorite FTP client (like FileZilla).
- Connect to your server and find the
/wp-content/themes/folder. - Unzip
realhomes.zipon your computer first. - Upload the entire extracted
realhomesfolder into that themes folder. - Head back to your WordPress Dashboard → Appearance → Themes and activate RealHomes there.
- From there, just follow Step 2, Step 3, and Step 4 above to finish up.
👶 Using a Child Theme
If you're planning to customize code or add your own CSS, please use the Child Theme. It keeps your changes safe so they aren't wiped out when you update the main theme later.
You'll find realhomes-child.zip in your download package. Just install and activate it exactly the same way you did the main theme.
⚠️ Troubleshooting Common Hiccups
Here are a few things that trip people up sometimes:
"Missing style.css" error
This almost always means you uploaded the whole package file instead of just the theme zip. 👉 How to fix it
"Link has expired"
This is usually your server saying the file is too big for its current settings. You'll need to increase your PHP upload limits. 👉 How to increase limits
Styles looking broken?
Often a permissions issue on the server folders. 👉 Fix file permissions
"Missing temporary directory"
This is a server setup thing. Your hosting support can fix this in a jiffy. 👉 Read more
❓ Still Stuck?
If something weird is happening that's not listed here, just drop us a line on our Support Platform. We're happy to help you sort it out!