Import Demo Content
Importing a demo is usually the fastest way to kickstart your project. It sets up your site to look just like ours, giving you a solid foundation to build on.
Watch this quick video to see the One-Click Import in action:
Method 1: One-Click Demo Import (Recommended)
This is by far the easiest way to go.
Step 1: Check Permalinks
Before we start, verify your URL structure.
- Head to Settings → Permalinks.
- Under Common Settings, make sure Post name is selected.
- Hit Save Changes.
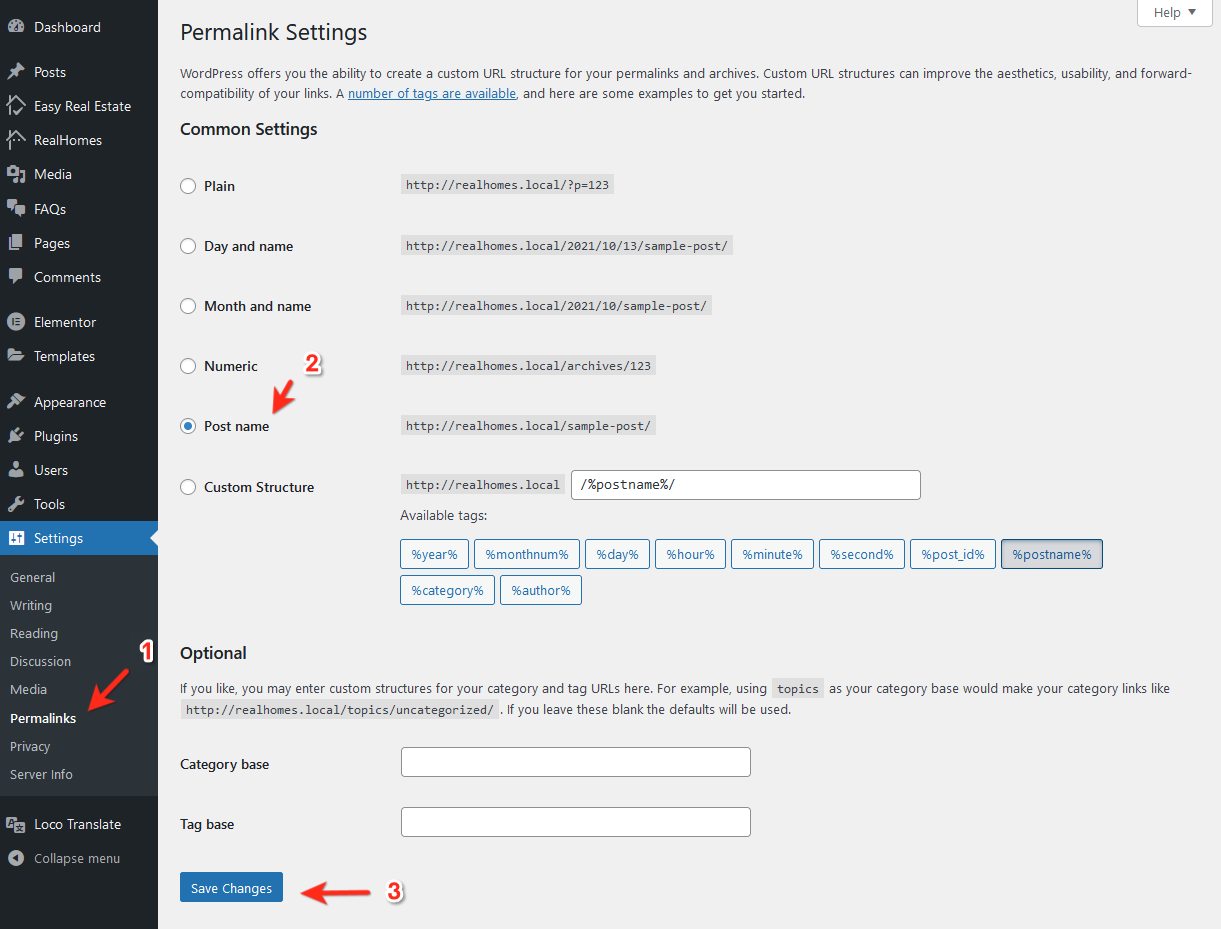
Don't Skip This!
The importer needs "Post name" permalinks to do its job properly. If you skip this, things might break later on.
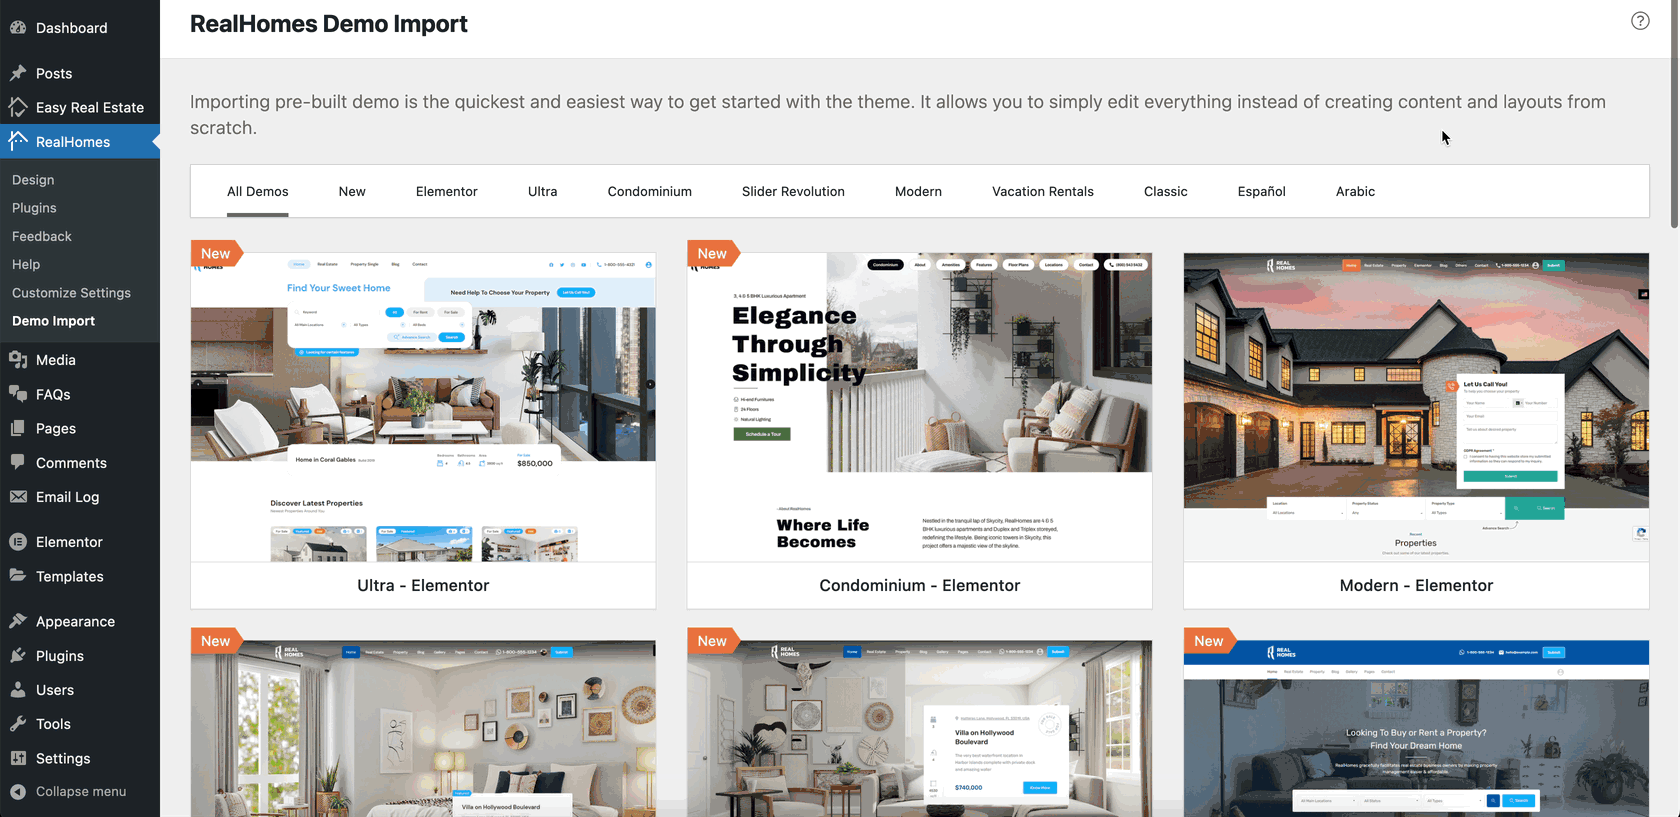
Step 2: Start Import
- Go to RealHomes → Demo Import.
- Browse the designs (Ultra, Modern, Classic).
- Found the one you like? Click the Import Demo button.
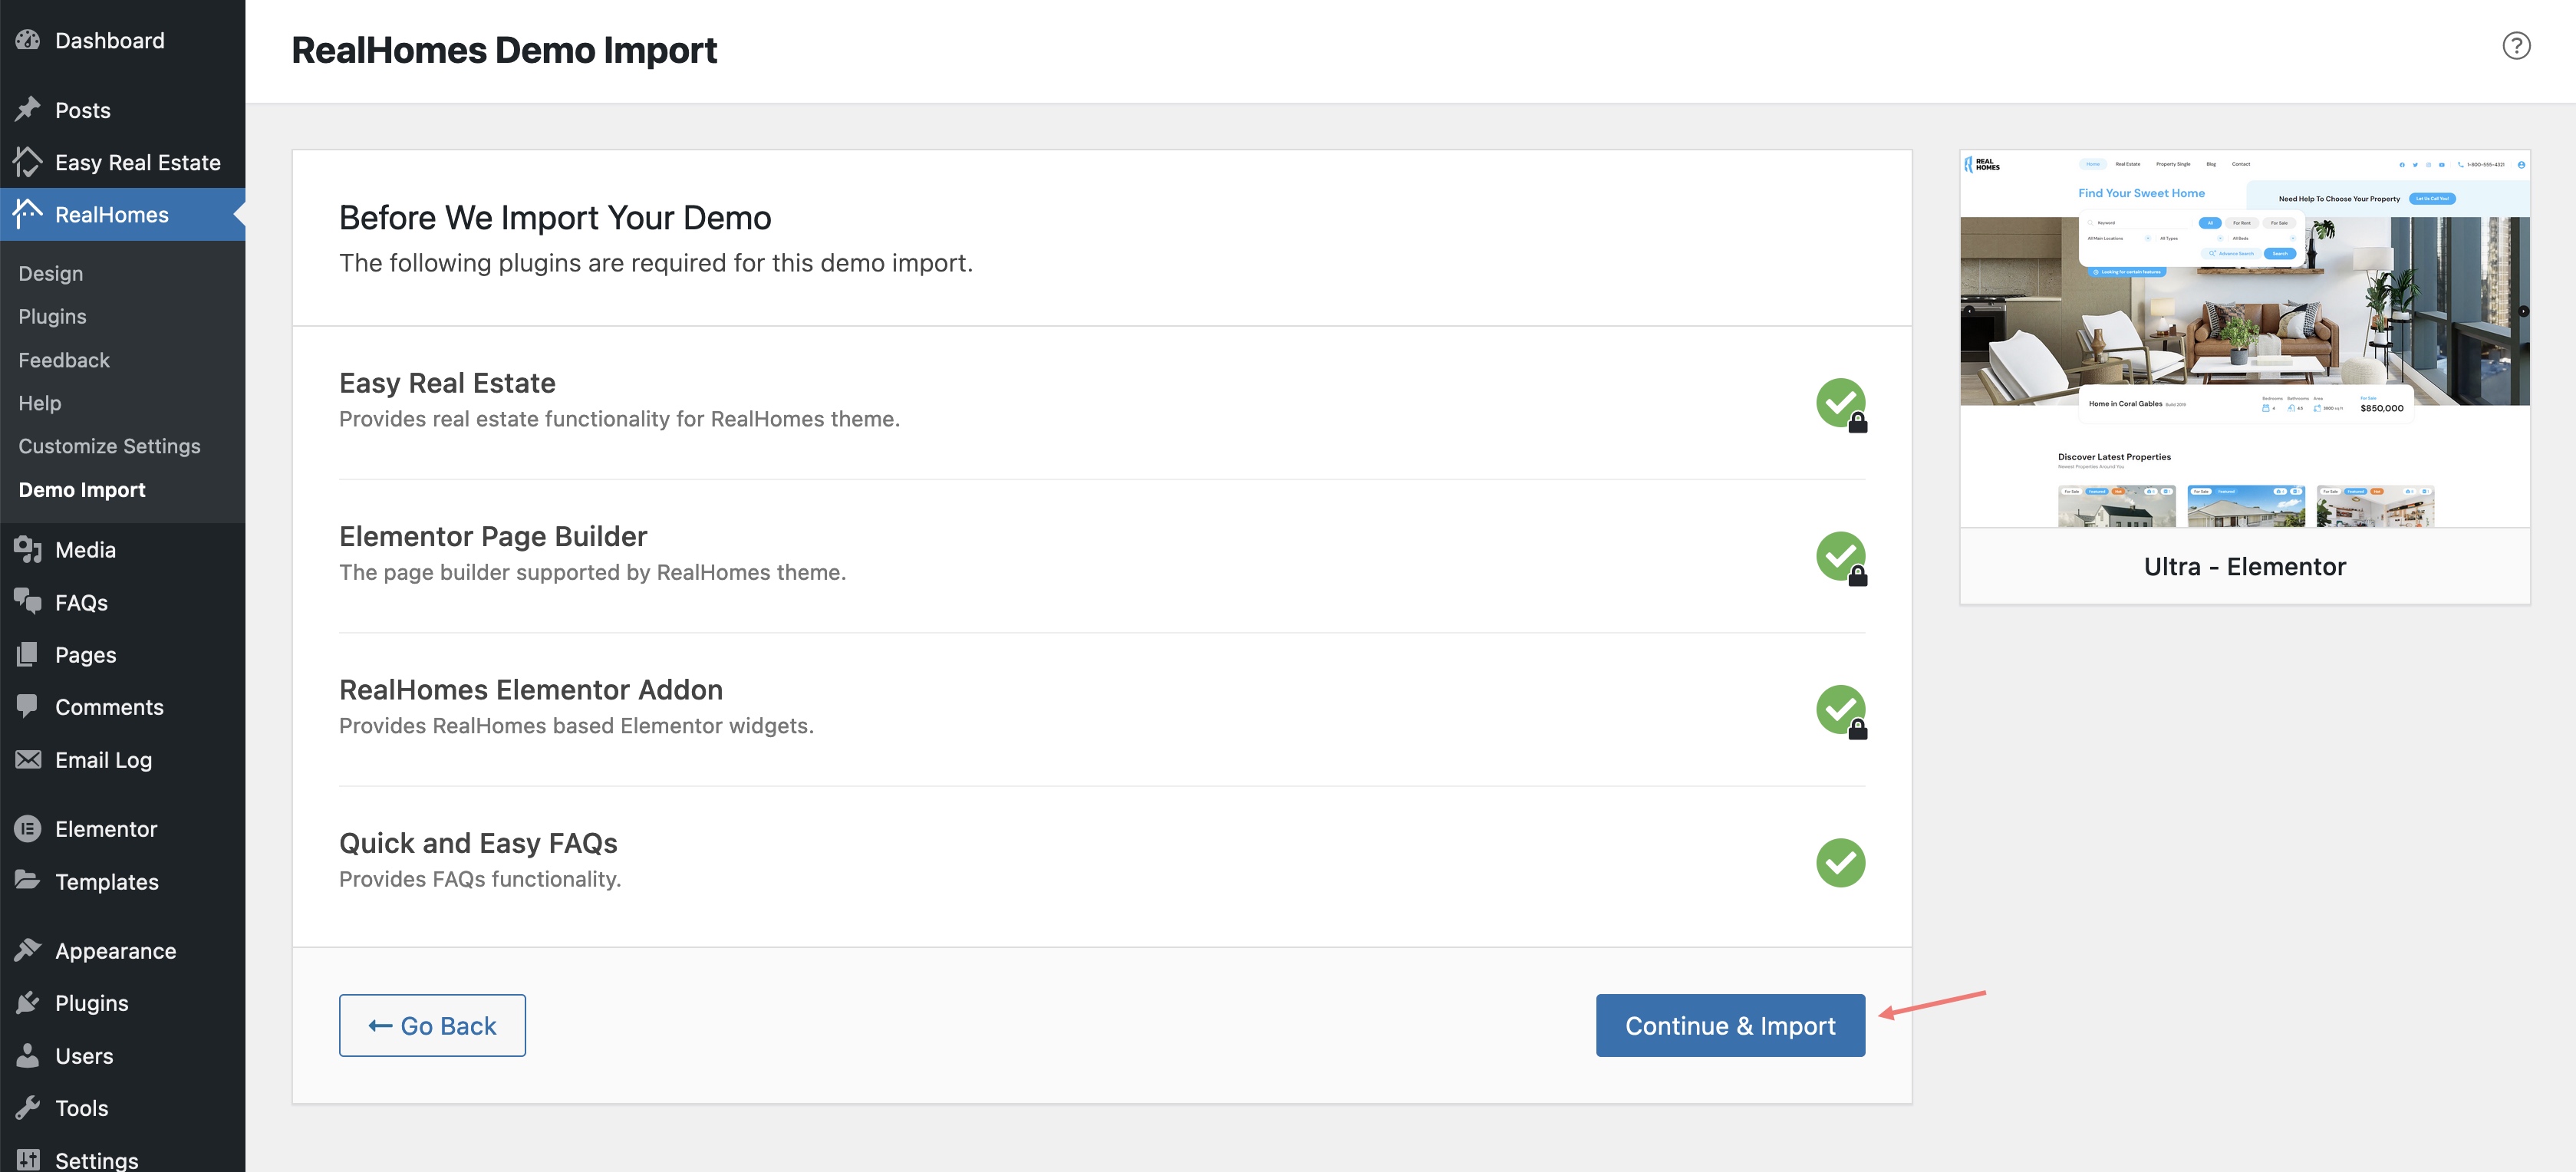
Step 3: Confirm and Wait
- You’ll see a list of plugins to install. Just click Continue & Import.
- Hang tight. We're downloading a lot of content and images for you. This might take a few minutes, depending on your internet and server speed.
If It Gets Stuck
If the import stalls or fails, don't panic! It's usually just a server timeout. Run the import again. The system is smart, it will recognize what's already there and pick up right where it left off.
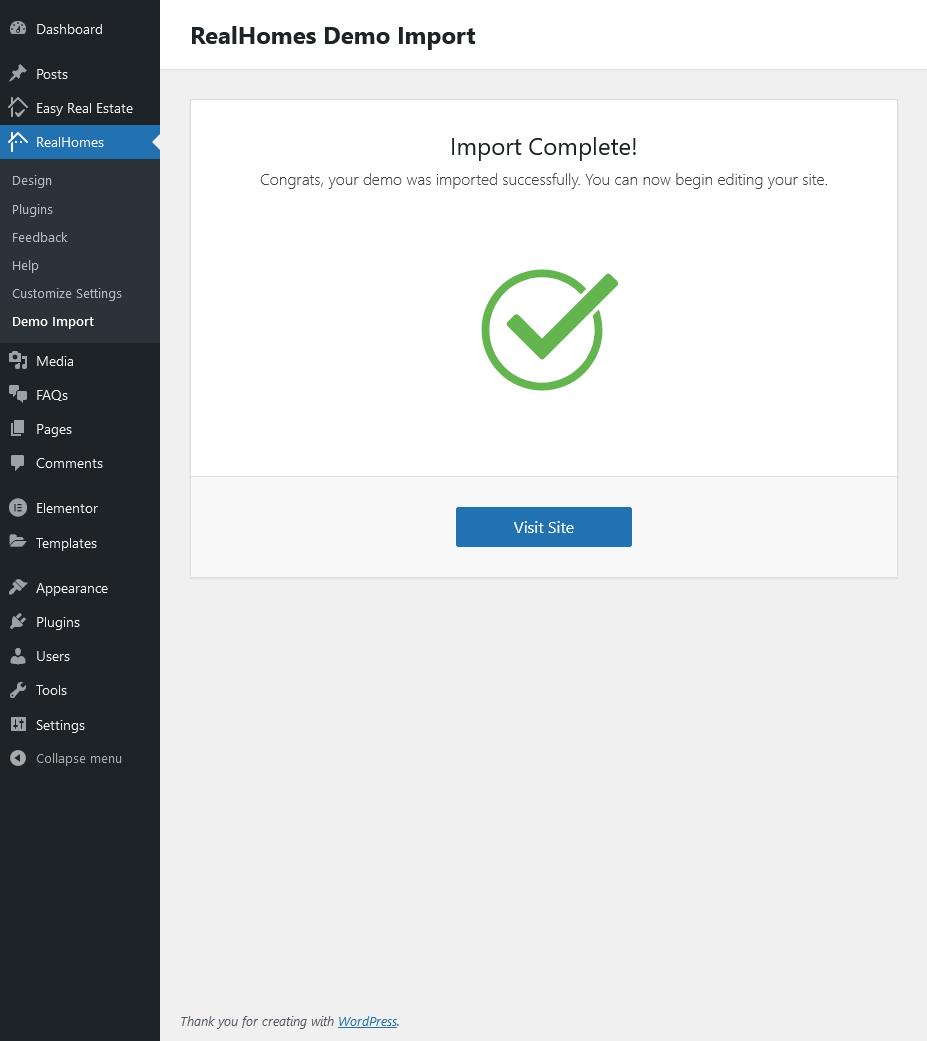
Step 4: All Done!
When it's finished, you’ll get a success message. Click Visit Site to admire your new website!
Step 5: Regenerate Styles (Optional)
If colors or layouts look a tiny bit off, Elementor just needs a quick refresh.
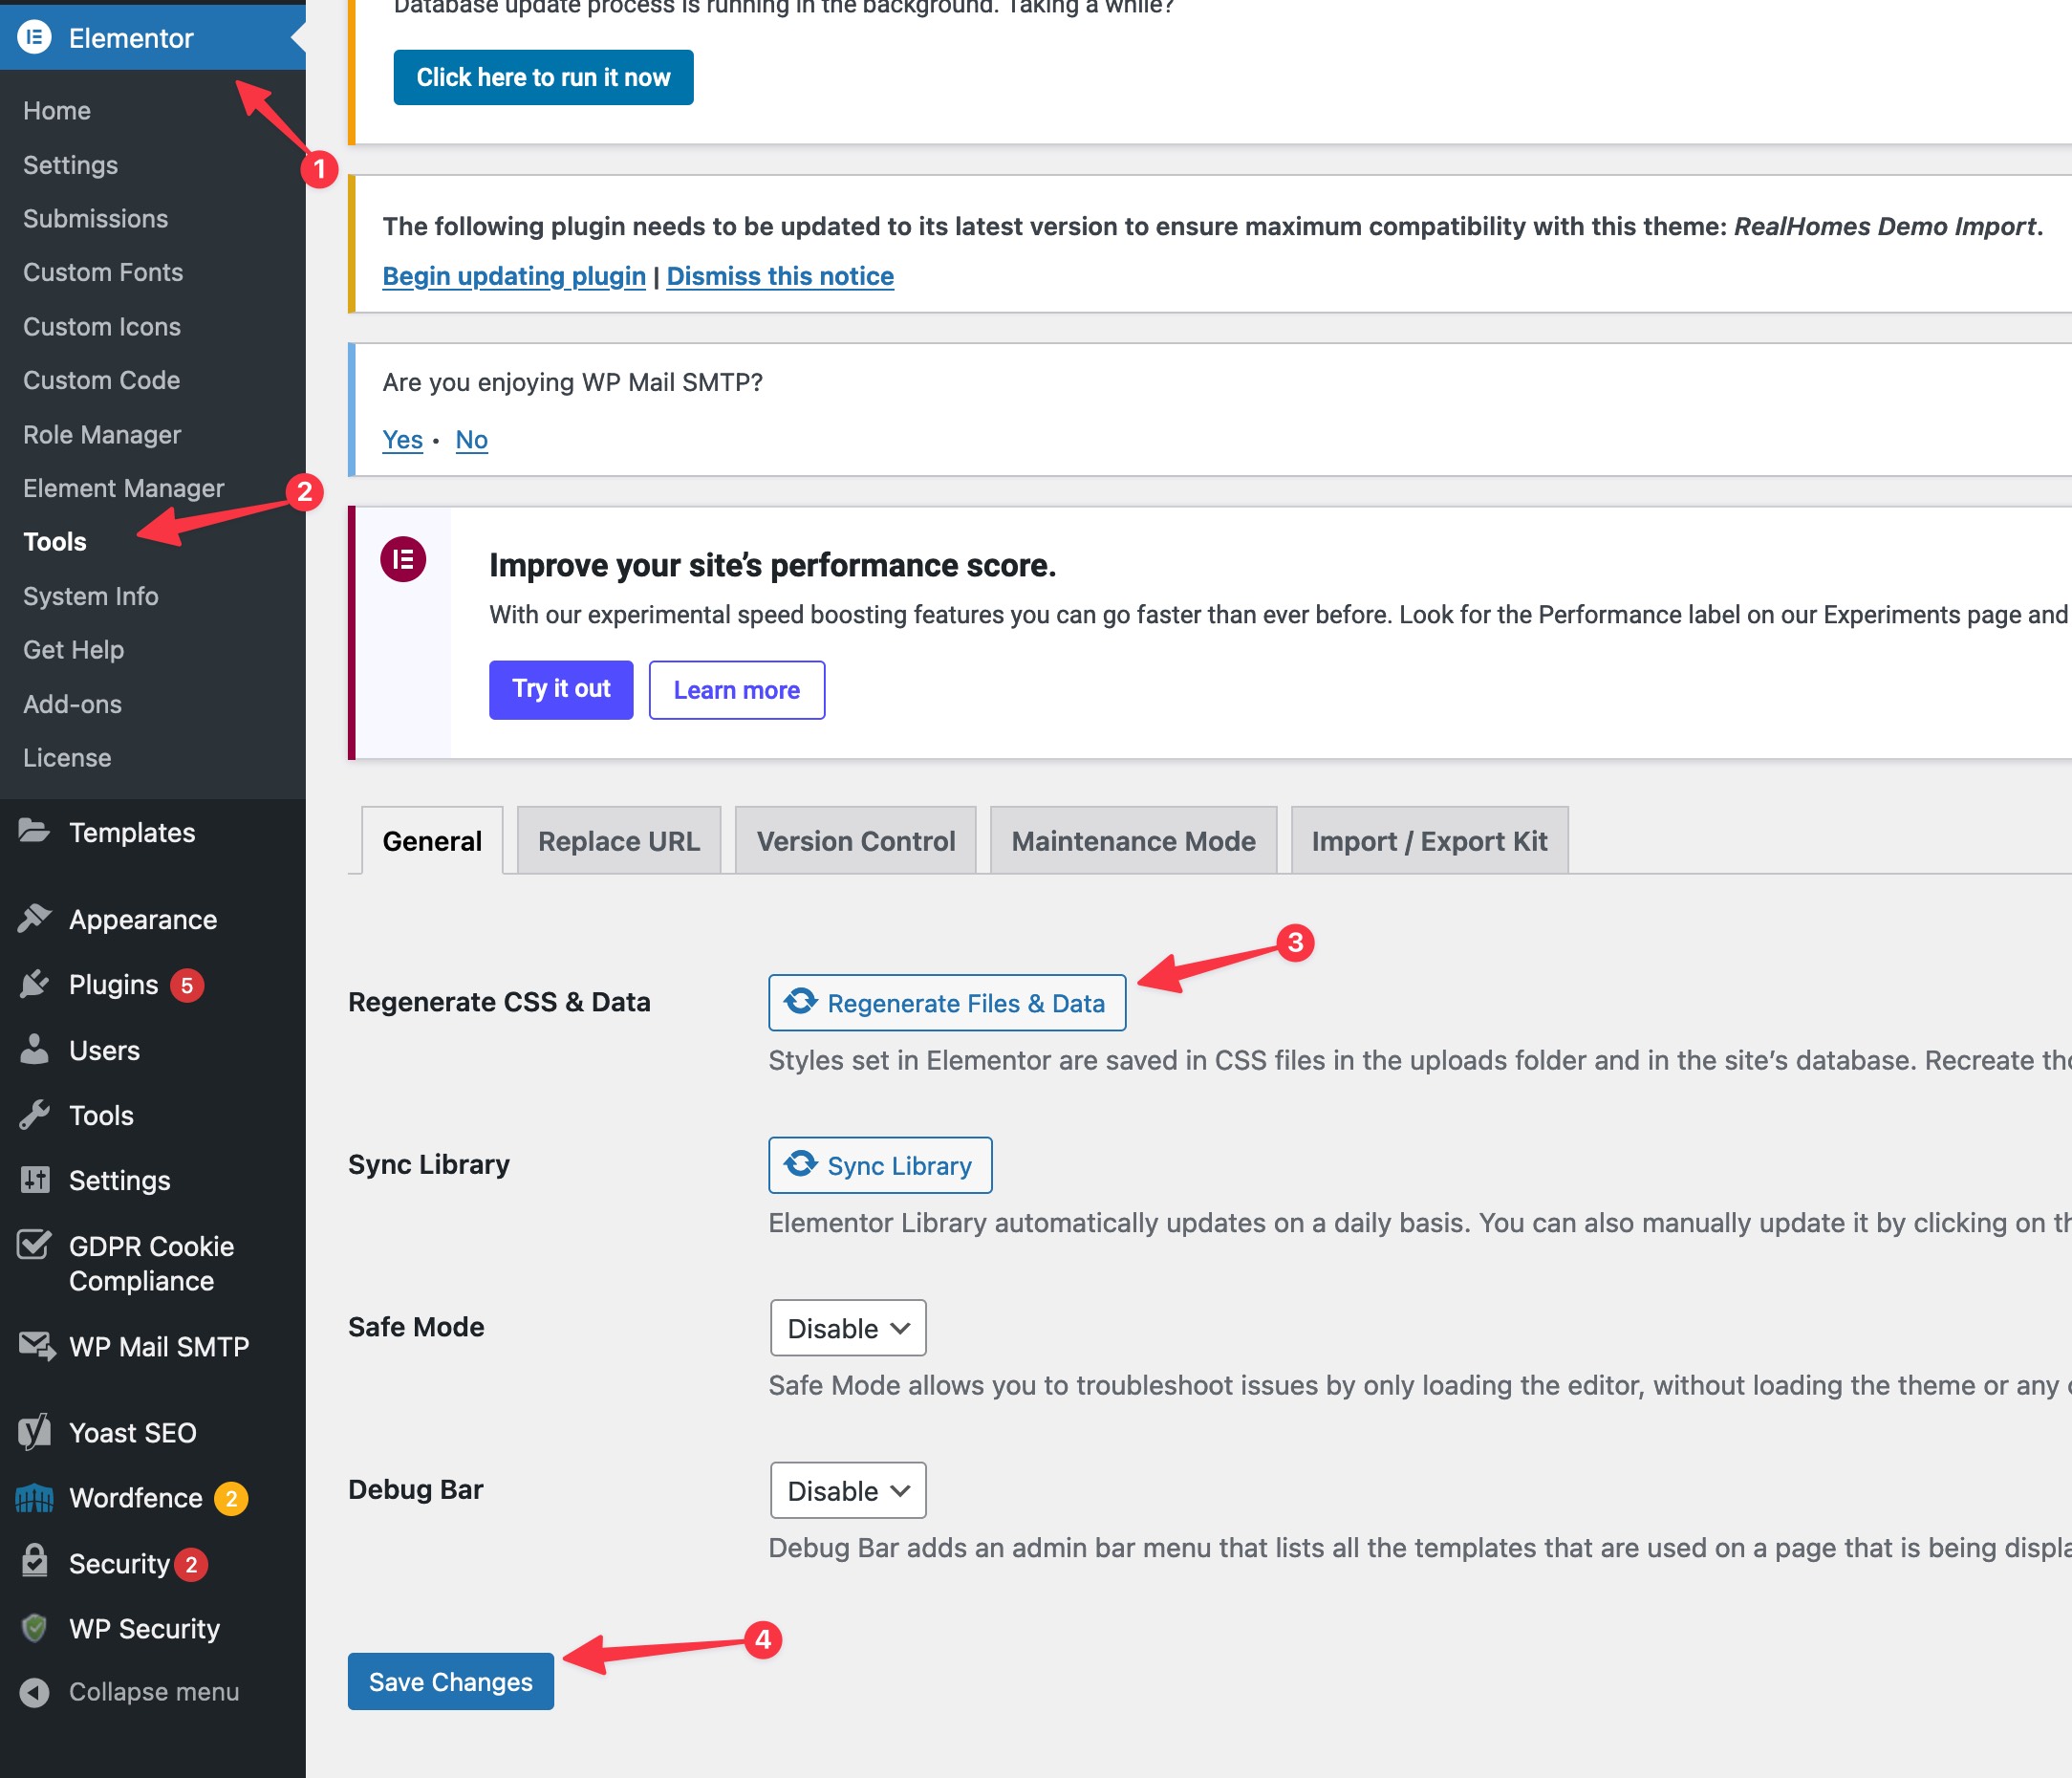
- Go to Elementor → Tools.
- Click Regenerate Files & Data.
- Save changes, and you're good.
Method 2: Manual Import (Advanced)
Only use this if the One-Click method just isn't working for you, usually due to strict server limits.
Step 1: Install Importers
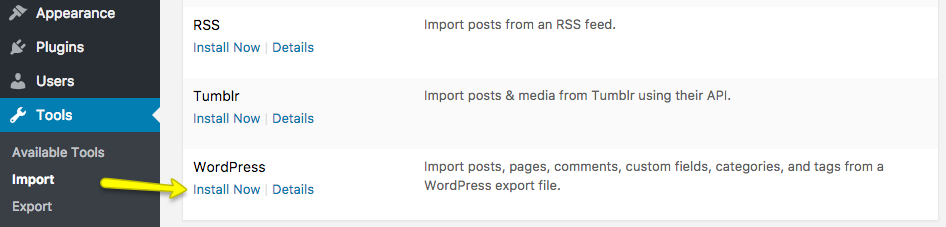
- Navigate to Tools → Import.
- Install the WordPress importer.
- Run it.
Step 2: Import Content (XML)
- Unzip the rh-main-package.zip from ThemeForest.
- Find the
Import XMLfolder inside. - Upload the XML file for your design (like
realhomes-modern.xml) to the WordPress importer. - Assign the posts to a user and check the box to "Download and import file attachments".
- Submit and wait.
Step 3: Import Menus
- Go to Appearance → Menus.
- Select the menu you just imported.
- In Menu Settings at the bottom, check Main Menu.
- Save it.
Step 4: Set Homepage
- Head to Settings → Reading.
- Select A static page.
- Set Homepage to "Home" and Posts page to "News" (or "Blog").
- Save changes.
Step 5: Import Customizer Settings
- Install the Customizer Export/Import plugin.
- Go to RealHomes → Customize Settings → Export/Import.
- Upload the
.datfile from the manual import folder matching your design.
Step 6: Import Widgets
- Install the Widget Importer & Exporter plugin.
- Go to Tools → Widget Importer & Exporter.
- Upload the
.wiefile.
❓ Need a Hand?
If you're stuck, come say hi on our support site. We'll help you get sorted out!